Goodbye Apple

You might wonder what such a title is doing on a photography blog. I’ll come to that in a minute.

My previous post contained a videoclip. In it Hans Aarsman explained that one of the reasons he’s still taking photographs – after quitting professional photography many years ago – was to keep memory of certain objects that he could then, subsequentially, throw away. This post is about getting rid of things. I have been using Apple’s personal equipment – iPods, iPads, iPhones and the like – for many, many years. I still have one of the first iPods they ever released. The ones with the monochrome display and jog dial. Believe it or not, it still works. I’m not the only one here at home who’s using Apple’s stuff. My wife and kids as well. One big happy Apple family.

Two years ago exactly I bought an iPhone 4s. Not for photography reasons, but simply for ordinary phone calls and sending text messages mainly. Over the years I started to use it as a remote control device for my sound system at home. And also for streaming music and video with apps like Spotify and Netflix. For the latter purposes (text messaging as well) wi-fi is in fact a pre-requisite. If you want to control your costs a little bit, that is. But since most people do, wi-fi operation is mandatory. This all worked fine until about a month ago. Now the iPhone 4s seems to be notorious for its wi-fi problems. I wasn’t aware of this, but am now. Have a look at the internet and you’ll be amazed by the number of hits you’ll find. I literally tried every possible remedy. Restored factory settings, no luck. The hair dryer/fridge trick, no luck. Had the wi-fi chip replaced by a certified local repair centre, no luck. Went to the nearby Apple store. They confirmed the issue to be a factory fault and offered me an iPhone 4s replacement. It would only set me back € 200! The other option they offered was an iPhone 5s replacement for which I had to pay € 350 and take a subscription for at least 1 year with one of their providers. I already have a subscription that I’m happy with. But these were the only 2 options I was being offered. Period. I could take it or leave it. I decided to do the latter.

Once outside I felt so extremely upset and insulted that I needed to think things over during dinner downtown. It didn’t help, really. My frustration grew worse. Why should I pay for a fix to a problem that I didn’t create? They admitted it themselves in the Apple store: it’s a known 4s factory issue. So, over a chicken tikka masala (more than fantastic, by the way) I decided it was time to say goodbye to Apple once and for all.

Finally we’re getting to the link to photography. Ever since I watched Hans Aarsman’s theatre show and read his book, I’ve had it with aesthetic photography, like him. I’m getting more and more convinced it’s the content that counts and not the form. I haven’t touched my DSLR for the last 2 months or so. In a proper Hans Aarsman tradition here’s a picture of my iPhone 4s before throwing it away. It served me well for 2 years, but fortunately I don’t have any emotional connection to a commodity device. Bye, bye iPhone. Bye, bye Apple.

Out-of-order iPhone next to other commodity tools

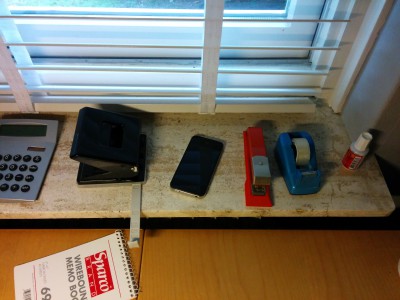
Out-of-order iPhone next to other commodity tools (shot with  Nexus 5)

For those who are wondering what I did next: I bought a Google Nexus 5 that same evening. After all, isn’t Google the next major photography software player out there? It’s a fine phone, by the way.


Posted in Uncategorized | Leave a comment

Photodetective

Attended Hans Aarsman’s theatreshow “The Aarsman Projection” the other day. Hans Aarsman is a former photo journalist who used to work for Dutch newspapers and published several books. But as of late he’s not a professional photographer anymore, but dedicated his career to photo analysis instead. He has several columns on the internet and one of the national newspapers where he analyses a particular photo in his own, characterizing style. Beauty, in a traditional sense as we, photographers, tend to interpret photographs, is not Aarsman’s angle. So, instead of using elements such as composition, use of colours and light, perspective, et cetera, he looks for details and questions their significance. With almost all images he analyses, he uses the internet to further research the details and often discovers all kinds cross-links with other images or photographers. In this respects, the term photodetective is very to-the-point.

“The human nature is to see only what it expects to see” Sherlock Holmes

This quote, appropriately from Sir Arthur Conan Doyle’s worldfamous main character, is the leading theme for Aarsman’s show. Watson – Sherlock’s assistant, for those unfamiliar with the characters – once asked Holmes: “How do you do it? You see the same things at the crime scene as I do. Still, you’re able to draw the right conclusions every time.” Holmes’ reply: “How many steps does our staircase at 221b Baker Street have? We both have taken hundreds of times, but I know it has 17 steps and you don’t. That’s the difference.” Basically this is what Hans Aarsman does in his photo analysis. He leaves beauty out of the equation. He finds aesthetical beauty boring and rather feels that people, who strive for this kind of beauty in their work, confine themselves to all kinds of rules that apply. Therefore, in his opinion, this kind of photography is not (or less) authentic. Aarsman approaches the image, or series of images, as a true private investigator. He has a keen eye for detail and does a lot of research (on the internet most of the time). Below is a link to video clip from a performance he did at one of the TEDx conferences (it’s not a clip from the theatre show). Here he explains why he stopped working as a professional photographer and is now full-time focused on photo analysis.

If you’re interested to read more of his philosophy on photography and his approach of the analysis, I recommend this book (Dutch only, I’m afraid). And, of course, I recommend a visit to one of his theatre shows or other performances. It certainly gave me a very interesting and enjoyable evening.

1001004011500376

Posted in Uncategorized | Leave a comment

No Capture NX3, but NX-D instead

Almost silently, at least I missed it, Nikon released a Beta version of their Capture NX tool end of February this year. It’s called NX-D ( for Developer) and will replace NX 2 on its final release. If you’re interested, you can dind the press release here. The Beta version can be downloaded for free at beta.nikonimglib.com.

Capture NX-D splash

This write-up is by no means a final and definite review of NX-D, but just some simple first impressions and thoughts. Many people have been wondering what the future of Capture NX would be, if any. At least, that’s clear now. All the people that loved (and still love) NX2 for a number of its unique characteristics, like the U-Point technology allowing you to make control points for local adjustmentments to the image instead of the whole image, will be disappointed, because it’s gone in NX-D. Just as the other feature is, that allowed you to store multiple edit versions in the original .NEF file. Also gone. NX-D uses the sidecar concept like many of the competing products. I have the impression that all the features Nik Software (when it was still a stand-alone company) originally contributed, have all been removed. This means the end of a previous co-development for this products and all software development of NX-D is now done for 100% under Nikon’s responsibilty.

From what I can tell, it delivers all the functionalty you normally expect from such an editing tool. It allows you to work with Nikon’s RAW files in .NEF format, including the newer RAW-S and RAW-F types. You can make all the usual adjustments to the image and store it as a .JPG or .TIF file. The user interface of NX-D feels a bit out of date already (remeber, UI has never been Nikon’s forte) and is definitely behind the look and feel of the competition.

I have not intention to join the Capture NX bashing camp, but when it comes to NX-D I really have been looking what sets it apart from the competition and what makes it unique and attractive to work with. For me, with NX2 this was more than easy enough to do. NX-D is NX2 with all the fun removed and just another editing tool. I’ll keep monitoring the progress of it, though, but it seems that all the high hopes many of us once had of an all-encompassing NX3, have gone down the drain. What a shame. The original design had so much potential. It’s now up to Google, as the proud owner of Nik Software, to do something with it and provide a viable alternative.

Posted in Uncategorized | Leave a comment

Colour Management

In my photography endeavours so far, I haven’t given the area of colour management very much attention. Sure, I do have a colorimeter and I do calibrate my monitor “every now and then”. But that’s as far as it goes, I’m afraid. I’m not very in to it and I’m satisfied with my results. I don’t receive any particular criticism when it comes to colours. So, in general, no good reason to do anything about colour management, but I happened to be talking to one of my fellow cameraclub members, the other day, and he asked me if I was using X-rite’s ColorChecker. Told him I wasn’t, but used it once during a workshop I attended a couple of years ago. Never bothered to use it afterwards, because it didn’t fit into  my workflow in those day and would force me to convert all my images to Adobe’s DNG format. Didn’t want to do that and never really gave it much thought since then.

However, his question triggered me. My workflow has changed and Lightroom, which I use these days in combination with the Nik Collection, has a very nice integration with the ColorChecker software that doesn’t require DNG to create new colour profiles. So, without any further ado, I ordered my ColorChecker. For those who are unfamiliar with the product, have a look at www.xrite.com or go to one of the many tutorials on YouTube. In one line: it allows you to calibrate your camera. Used in combination with a calibrated monitor, you can rest assured that the colours at the time of the shoot are the same as when doing your editing on the PC.

Below are the results of my first ColorChecker shoot. It all depends on how “colour capable” the monitor is you’re viewing this website on, because the differences are subtle. Going clockwise, the first image is uncorrected. Using the wite balance colour temperature “as shot” and “Adobe Standard” colour profile. The seconds one has only the white balance corrected. It was 4.600 “as shot” and ColorChecker increased it to 5.100 giving better skin tones and overall slightly warmer colours. The third one uses both a white balance of 5.100, plus a newly created colour profile (.icc file). To me, this one is over the top with too much colour saturation. Number four has the white balance colour temperature set back to the original 4.600 and the newly created colour profile applied. As far as I can tell, this is the best combination.

01_Standard 02_CC_WB5100

04_CC_ICC 03_CC_WB5100_ICC

So from now on, all my studio shoots will have at least one image with the ColoChecker device present for each distict lighting setup. During editing with Lightroom I will create a profile for the lighting setup and use it for all subsequent shots. Sounds like a lot of work when you describe it like this (and that’s why I never bothered probably), but in reality it’s quite easy. For more accurate colours it’s worth it.

With a calibrated camera and monitor I have colour management covered. Almost. Who said printer…?


Posted in Uncategorized | Leave a comment

Self-portrait feedback

On the self-portrait I published in the previous post (see here), I received a number of comments. Some people didn’t like the fact that the wet plate artifacts (or markings) crossed my face, especially my nose and eyes. In my opinion, the unpredictability of the chemical process is one of the characteristics of the wet plate. This applies, of course, to the original workflow and the way it was done back in the 19th century. My workflow is strictly digital and the end result, therefore, to be manipulated. This is true. And, yes, I also tweak the filter and texture settings to get the result I want. But every now and then I like to leave some of the markings as they are. So, if a scratch happens to be across my nose and eyes, so be it. This could have happened with the true wet plate process as well. Is the photograph therefore a failure? Not to me.

_RCP9759-Edit

_RCP9722-Edit

_RCP9776-Edit

Posted in Uncategorized | 1 Comment

A digital wet plate self-portrait

One of this year’s assignments of my local camera club is  self-portraits. I’m not particularly keen on this. Like many others, I don’t like to see myself on pictures. For whatever reason. But I gave it a shot, nevertheless.

As it happened, I came across wet plate technology and decided to use it for the self-portrait assignment. The photographic wet-plate process was developed around 1850. There’s plenty of stuff to be found on the internet, so I’m not going to explain it here and pretend I’m some sort of “mister-know-it-all”. I found the following clips on YouTube very helpful in understanding the process: Getty MuseumAlex Timmermans, Daniel Carillo and Ellen Susan.

I like the results of the wet plate process very much. The shallow depth of field, the unpredictable artifacts, the deep blacks, giving you an entirely different soul and character than the original. But all I have is a digital camera and not the one to put the plates in. I used to have a dark room, but don’t have it anymore. And besides all these things I don’t have, I think the whole process is too cumbersome and time consuming just for this self-portrait assignment (you never know what I might do in the future…). So, end of assignment? No way! The good people of Nik Software came to the rescue. In addition to their wonderful tools, like Color Efex Pro and Silver Efex Pro, they recently released another gem called Analog Efex Pro. Check out some tutorials on YouTube here. It allows you to post-process your images by simulating an analog camera. This can be a vintage camera you found on an attic somewhere. It might have some mold on the lens or other unknown “features”. It can also be a toy camera or a wet plate camera. So there we go. Analog Efex Pro allows me to keep the whole process digital and avoid working with toxic chemicals. And the image at the end will have a somewhat similar look (I’m sure wet plate die-hards will disagree with me here, so that’s why I said “somewhat”).

I sat down in my studio. Put on some John Legend music for the right atmosphere. Setup the strobes (just 1, as a matter of fact) and a reflection screen. Measured the light using a dummy. Connected the cable release to the camera. Sat down and took a series of shots. And then the fun really kicked in. I had a great time post-processing them with Analog Efex Pro. I limited myself to just the wet plate camera type and ignored the others for the time being. It’s really amazing what this product allows you to do and what you can achieve.

_RCP9710-Edit-4_RCP9713-Edit-2

You can add dirt and scatches, like dust and corrosion, and wet plate chemical artifacts. Or leave them out. Altough it’s tempting to play with them, my recommendation is to don’t overdo it and keep it simple. One of the nicest features of Analog Efex Pro is called Bokeh and I hope to see it included in all other Nik’s plug-ins soon. It’s a two-ring drag-and-drop utility to very accurately create your desired depth of field. You can vary from circle to ellipse and drag it around. Of course, you can set the amount of blur you want.

Before you think this a sponsored post and before it’s becoming to sound too much of a commercial, I’d better stop here. Go and have a look at Analog Efex Pro here and download it for free for 15 days. It certainly helped me to create some stunning images for my self-portrait assignment.

Posted in Uncategorized | Leave a comment

Does it make sense?

Our human senses enable us to experience external factors and, therefore, interpret the world around us. First of all, we can label things by seeing, hearing, feeling, smelling and tasting them. For instance, our taste allows us to determine if something is sweet or salty. Likewise, our hearing enables us to tell if something is loud or soft, high or low, et cetera. And the same applies to our seeing as well. It enables us to say if what we see is bright or dark, colourful or dull. But all examples so far show that our senses allow us to register. The next step, therefore, is to interpret what our senses have registrered. For this interpretation another part of our body is needed: our brain. Interpretation of the data we have registered allows to say, for instance, if we find something good or bad, beautiful or ugly, tasty or disgusting. We can conclude that the process of sensing something, in fact, involves 2 steps: 1) registration and 2) interpretation.

For centuries people have been wondering if experiences are equal across different persons. If this were true, our senses would have to be sort of calibrated to the same standard. Of course, this is not the case. When you test the various senses between 2 different persons, you can easily demonstrate that they differ when they taste or smell the same substances.

What do all these observations mean to photography? Well, a number of things. First of all, photography allows us to see the world through someone else’s eyes. When someone places a camera in front of his/her eyes, an external (calibrated) sensor is being used: the lens. Just like our own human eyes, the camera lens merely registers whatever it’s “seeing”. And again similar to our human example, the registered data is transported for further processing and storage. This stored image can optionally be further processed outside the camera. The result can be an image that exactly matches the situation as the photographer saw it at the time when he took the picture. If the photographer makes sure that the end-result contains exactly the same colours, contrasts and brightness as he/she originally saw it, others can basically see the world through his/her eyes.
Secondly, the photographer can influence the end-result by making use of a number of technical features the camera has to offer. For example, a specific aperture or shutter speed can be used to create a more or less special effect. Manipulating an image during post-processing takes this even a step further. You can use familiar dodge and burn techniques to emphasize certain parts of the image, but at the same time tools like Photoshop offer a plethora of options to inluence the expression or meaning of the image. This way, photography not only allows to have others see the world through our eyes, but through our brains as well. It allows the photographer say “Look, this is how I saw it”, but also say “Look, this is how I experienced it”.

So, if photography gives us the tools to register and, to a certain extent, the options to interpret, what is the added value of us humans?  Probably too much to mention, but obviously, a camera or tool will never be able to determine if a picture is good or bad, beautiful or ugly. This will always remain a personal observation. Our human prerogative.

Posted in Uncategorized | Leave a comment

Landscape tryout

A couple of weeks ago I attended a presentation by Wilco Dragt about landscape photography. Wilco is a fine art photographer and, as far as photography is concerned, he does nothing but landscapes. Over the years he has developed his own style, which is almost minimalistic. A “less is more”kind of photography. He uses long exposures, ranging from 10 seconds to 4 minutes or more. And he uses ND-filters (neutral density). His pictures give a very balanced, almost serene, kind of atmosphere. He’s inspired by Michael Kenna and Ansal Adams. I can only encourage you to see his work at www.wilcodragt.nl. With some fellow photographers, organized in Nordic Vision, he runs workshops in various countries in Europe. See the website to find out more.

Wilco explained he invests much time researching and preparing his pictures. He uses Google Earth, checks weather forecasts and times of sunrises and sunsets, tide tables, visits actual locations and so on. He does a very thorough job at this. He prefers taking the pictures at sunrise. Somtimes this means he has to wait for half an hour or so to get the light just right. And luck. He needs to have that as well. For almost all of his work he uses a LEE ND-filterset, a tripod and long exposures.

Somewhat inspired by Wilco’s story and pictures and also in an attempt to get out of my shutter block state, I gave it a try myself this morning. Not the full monty to begin with, but a sort of tryout. This means I had to get out of bed way before sunrise. It isn’t as bad as it sounds at this time of year, though. I went to a small pond close to where I live. It was hazy. Just enough to create a serene atmosphere. Obviously I was hoping the sun would come through, but it didn’t. I took some shots at f/2.8 and 400 ISO. So nothing like long exposures, no tripod, no ND-filters. After all, it was just a tryout and a bit of experimenting. Yes, there is the time you have to get out of bed, but shortly after you find yourself in the middle of nature where I saw some deer, listened to the birds. In a world that’s yawning and ready to get up. All by myself, no one else around. Given the limited means, I find the results below very encouraging. Not even close to the work of the likes of Wilco, but I simply liked doing it. I think I’ll do more of this work. Perhaps even join one of his workshops one day. Keep checking this blog if you want to monitor my progress in this area.

_RCP9604-Edit _RCP9602

Posted in Uncategorized | Leave a comment

Reminiscing

What do you do when you suffer from a shutterblock? Well, for one thing, you don’t take any new pictures. Instead I find myself going back to the past. I happened to come across a bunch of old black and white negatives last week. I took the pictures back in the mid 70’s and I developed them myself. Those were the good old analog days. Printed them myself also, but I seem to have lost the prints. Couldn’t find them anywhere, just the negatives. I also have a Nikon Coolscan scanner stacked away somewhere, but it only has 2 SCSI connectors. Based on the horror stories I read on various sites, I didn’t even try to connect to my PC. Simply took the negatives to the local camerastore who did a fine job scanning them for me. It was downhill when I received the digital copies on a memory stick 2 days later: familiar editing with Photoshop and Silver Efex Pro. A lot of scratch and dust removal. I’m quite handy now with Photoshop’s healing tools!

The cat I used to have some 35+ years ago. Who could have thought its picture would one day end up on a site on the world wide web…

Brammetje

Posted in Uncategorized | Leave a comment

Shutterblock

Just like to coin a new word here: shutterblock. I suffer from it. It is the equivalent of a writer’s block. Like an author can stare at a blank sheet of paper for hours (or days, weeks, months) without writing anything, I can pick up my camera, hold in my hands and not take any pictures. For a couple of hours, days, weeks, months. I’m stuck and don’t know what to do about it. It’s even worse. Where I could read about photography in the past or visit exhibitions, this seems to have come to a complete halt as well. Lack of interest. Haven’t really heard of other people that have experienced similar symptoms. Haven’t heard of a cure, like a medicine or therapy, either. I even had to set myself to write this post. Cowerdly postponed it until the last day of the month. It’s serious.

I’m going to attend this evening’s mentoring program session. To explain my problem. Feels like an alholic going to his first AA meeting: “Hello, my name is Reinier and I don’t like taking pictures”. Something like that.

Keep visiting this blog if you want to know how it develops. Keep in mind, this might be te last post here…

If it sounds familiar or you have suffered a similar illness, please feel free to reply. I’m open to any remedy.

Posted in Uncategorized | Leave a comment