High key, low key
A piece of background information on how the high and low key pictures were taken and some personal comments on the results. Many people believe that taking high key pictures is a matter of overexposing and taking low key pictures a matter of underexposing. This is absolutely not true. Both techniques require accurate lighting. With high key the majority (not necessarily all!!) of the greyscale tones are between the values 128 and 255 and with low key between 0 and 128. But you always have to make sure that the images have enough details in the light and dark areas and that no clipping occurs. That’s why it requires delicate lighting and it’s not just a matter of over- or underexposing.
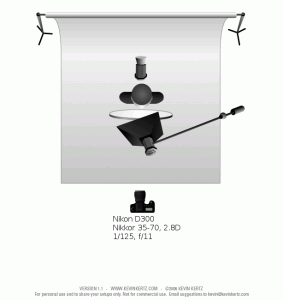 | For the high key images I used a setup similar to the one on the left. I used a white background. A strobe positioned right behind the model was to give a big shot of light. The power was 1.5 stop more than the main light, the softbox at 50cm right above the model’s face. Under the model’s chin was a round silver reflector panel to light up the shadows under the nose and chin. Took a meter reading for f/11 and gave the main light power 3.8. Both strobes are Elinchrom D-Lite 4. I wanted the background to be 100% pure white. I also wanted no to minimal shadows on the model’s face and very soft light. |
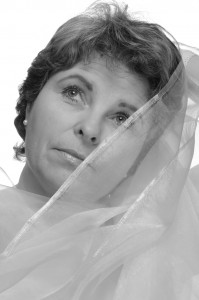 | Lighting exactly as I wanted it to be. Pure white background from left to right and from top to bottom. I overexposed all high key shots by 1/3 stop to get an even lighter image. The face has no shadows. The softbox above was very close causing the soft light. The silver reflector from below removed any shadows under the nose and chin. As high key as high key can be! |
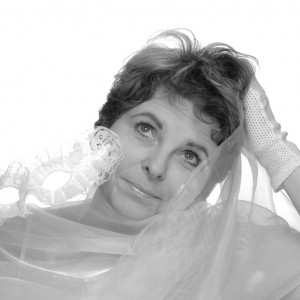 | I did not take a seperate reflective meter reading from the white background. I gave the strobe behind the model's back a power level of 5.5. This was a bit too much. The light that bounces back takes away some of the white details. The lace in the top of the mask is partly gone. |
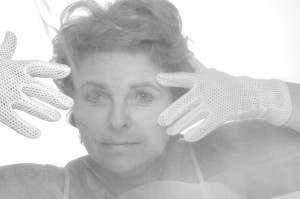 | Here the model is completely behind a white veil making the image extra soft, exept for the hand and glove on the left side. They are in front of the veil. No post-processing tricks with Photoshop were done on this image! This is what Frank Doorhof means with "why fake it if you can create it". I thought it was a nice touch (and I still think it is). Something I need to work it out properly one day. Pay more attention to the composition, in my opinion. |
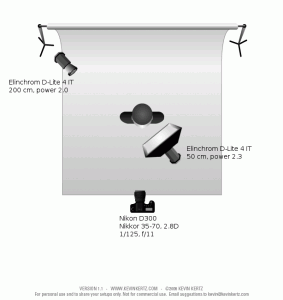 | Used a different lighting setup for the low key shoot. The diagram is shown on the left. Used the same softbox as before as the main light. Also used the same white background as before, but because of the strong light falloff (softbox was only 50 cm away) I knew the result would be grey. Used a strobe with 20° grid as a subtle hairlight. |
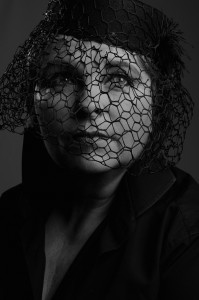 | On this image you can see the effect of the hairlight causing some specular highlights on the model's right cheekbone. From a low key perspective, it is a good picture. The histogram show that the image even has no real black tones (0, 0, 0) at all. The majority of the tones are between 0 and 128. And still with enough detail in the dark tones (if your minitor is calibrated correctly). |
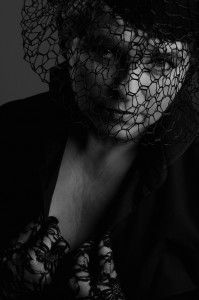 | My personal favourite. It meets all the low key characteristics, but the model's pose is better than in the other low key images. A different camera position with the camera above the model's eyes. This causes the model to look up. In combination with her hands holding the shirt at the breast, gives an interesting look. To me, the image sticks and that's what counts. |


